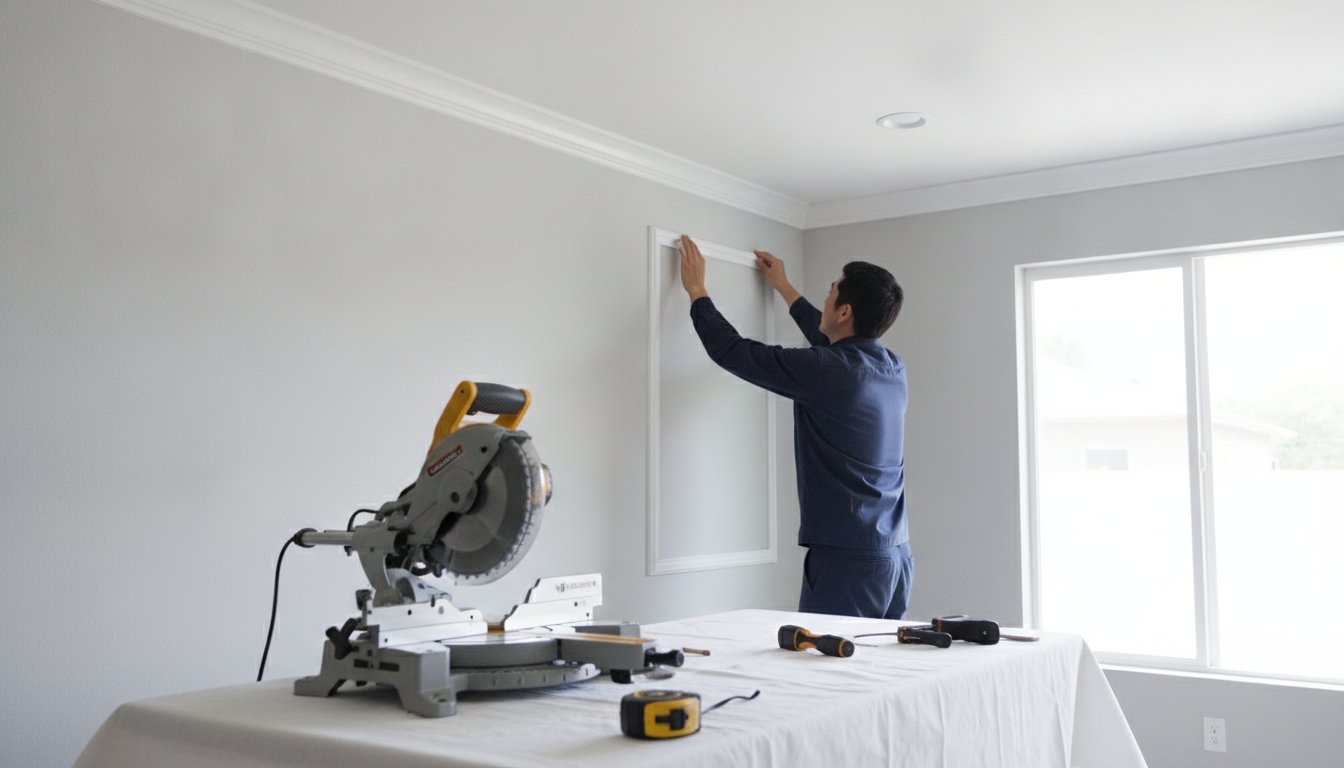
Your home’s walls are not square, and they never will be. Most homeowners discover this truth the hard way when they find gaping holes in their corners after hours of work. Professional crown molding installation isn’t actually about finding perfect 90 degree angles; it’s about the art of masking structural imperfections. If you’ve ever felt the sting of wasting expensive trim on a bad miter cut, you aren’t alone. It’s a common hurdle that stops many projects before they truly begin.
We understand that you want a seamless finish that elevates your interior spaces without the headache of trial and error. It’s frustrating to deal with confusing bevel settings or struggle to match trim to your existing interior painting. This guide provides a clear path to mastering the complexities of trim work, from material selection to the final installation. You’ll gain a solid understanding of how to handle difficult cuts and achieve a high end look. We’ll walk through the entire process and help you manage costs effectively. By the end of this article, you’ll have the knowledge needed to transform your home with confidence and precision.
Key Takeaways
- Learn how crown molding transforms a room by drawing the eye upward and creating a seamless bridge between your walls and ceiling.
- Discover why professional crown molding installation is essential for homes with non-square walls and complex compound miter angles.
- Understand the technical advantage of using a coped joint over a basic miter cut to ensure your corners stay tight for years.
- Compare materials like MDF and solid wood to choose the most stable and cost-effective option for your specific interior design.
- Prepare for unique architectural challenges found in San Gabriel Valley homes, including uneven plaster ceilings in historic properties.
What is Professional Crown Molding Installation and Why Does It Matter?
Crown molding acts as a decorative bridge between your walls and the ceiling. It’s more than just a piece of trim; it’s a structural illusion that hides uneven joints while adding a layers of sophistication to a room. Professional crown molding installation focuses on these fine details to ensure a seamless transition that standard construction often lacks. By drawing the eye upward, this trim creates an immediate sense of height and volume. It turns a plain, boxy room into a structured architectural space that feels intentional and complete.
For homeowners in the San Gabriel Valley, these details translate to real market value. In competitive areas like Pasadena and Arcadia, buyers look for architectural character and high end finishes. Quality trim work suggests a well maintained property. It often leads to a higher appraisal value during a sale or a smoother rental turnover process. Whether you live in a historic Pasadena bungalow or a modern condo, the right molding establishes a sense of permanence and craftsmanship that paint alone cannot achieve.
The Different Profiles of Crown Molding
Selecting the right style is the first step toward a successful transformation. Popular profiles offer different vibes for your home:
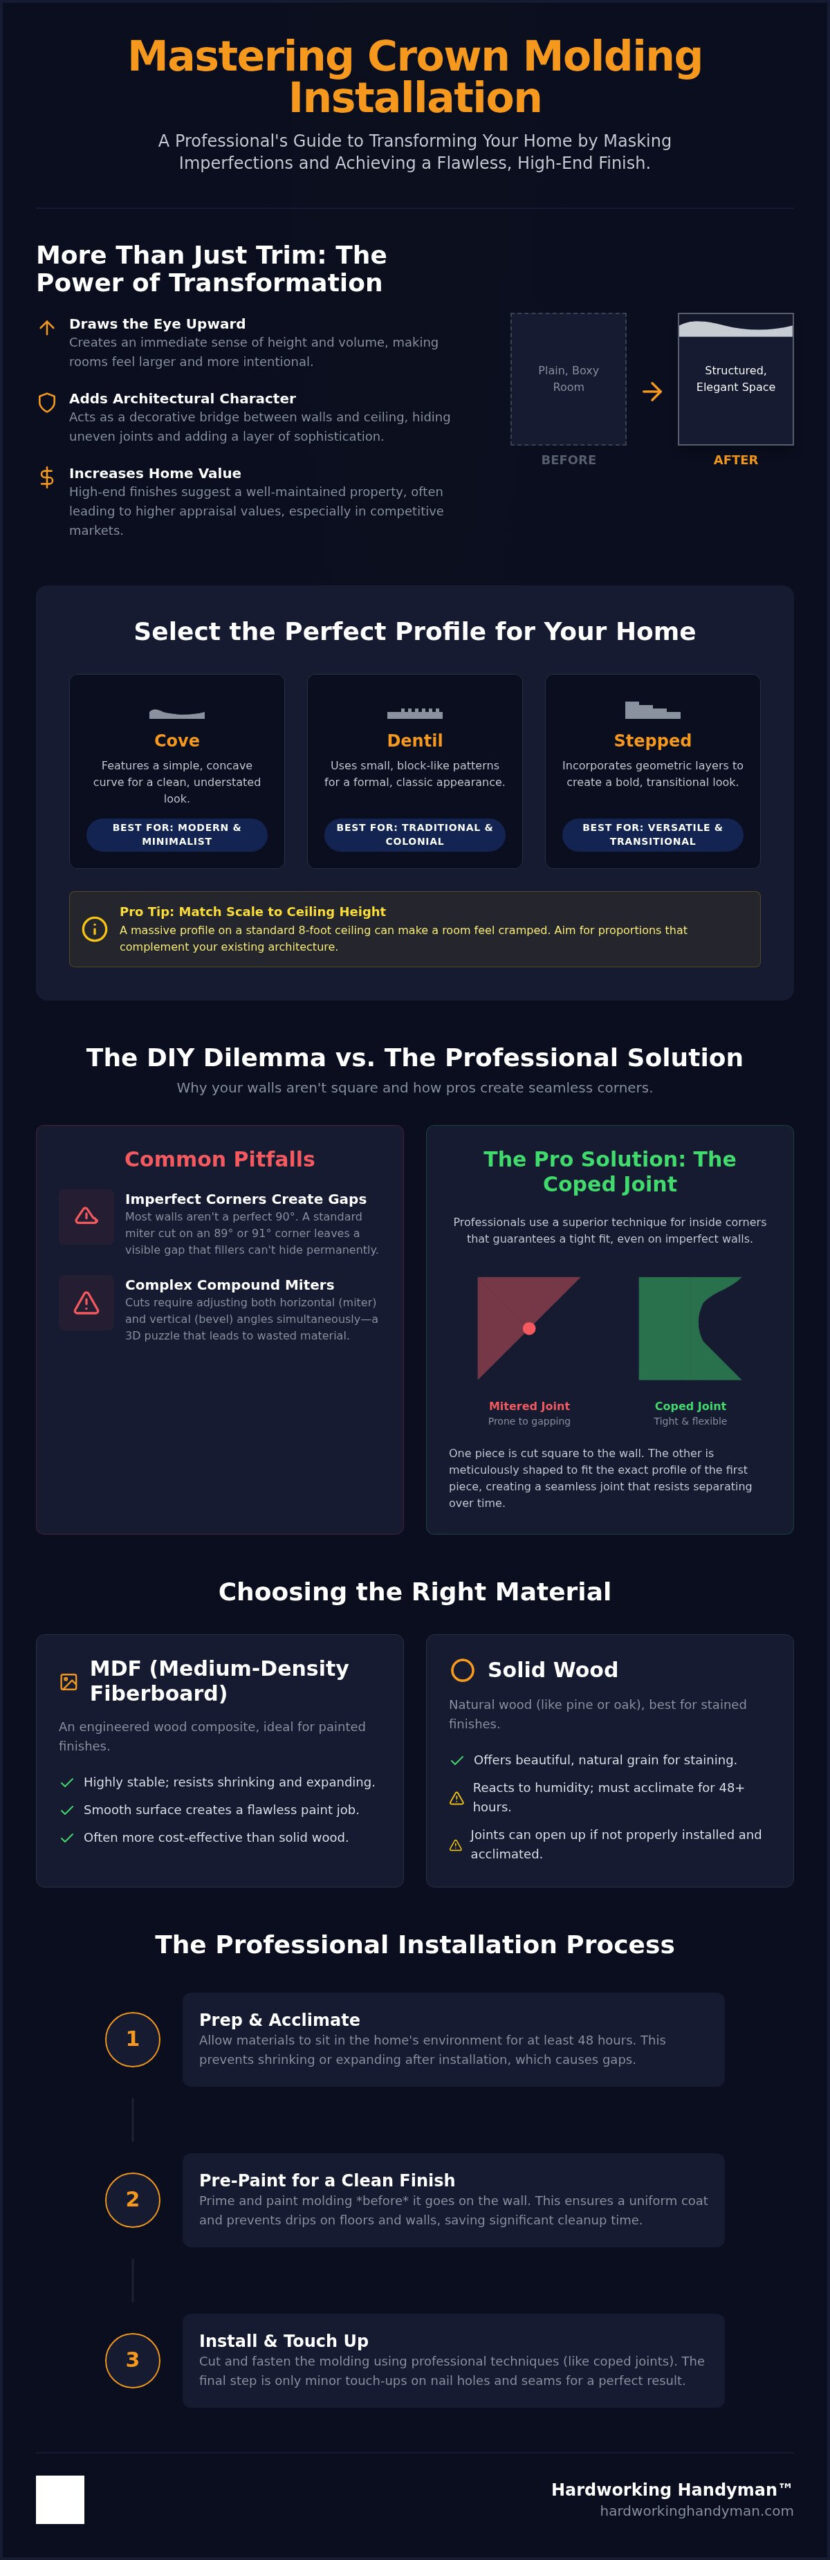
- Cove: Features a simple, concave curve. It works best in modern or minimalist spaces where clean lines are a priority.
- Dentil: Uses small, block-like patterns for a formal, classic appearance. This is a staple in traditional or colonial style homes.
- Stepped: Incorporates geometric layers to create a transitional look. It’s versatile enough to fit almost any interior design.
Always match the scale of the molding to your ceiling height. A massive, six inch profile on a standard eight foot ceiling can make a room feel cramped and heavy. Aim for proportions that complement your existing architecture without overwhelming the space. If you’re unsure about the fit, hold a sample piece against the wall to check the visual weight before purchasing your materials.
The Role of Trim in Interior Painting and Touch Ups
Molding serves a functional purpose for your walls. It provides a clean break for two-tone paint schemes. This makes interior painting much simpler because you don’t need to cut a perfect line where the wall meets the ceiling. The trim hides that transition entirely. It also protects the top of your drywall from accidental scuffs during furniture moves or cleaning.
We recommend priming and painting your molding before it hits the wall. This prevents drips on your flooring and ensures a uniform finish across every piece. Once the professional crown molding installation is complete, you only need to perform minor touch ups on the nail holes and joints. This methodical approach saves time and delivers a professional result every time. It keeps your interior looking sharp and minimizes the mess inside your living space.
The Technical Challenge: Why Your Walls Aren’t Ready for Crown Molding
Most homeowners assume their walls meet at a perfect 90 degree angle. This is almost never the case. In older homes across Pasadena and Monrovia, decades of settling and structural shifts mean your corners are likely 89 or 91 degrees. Professional crown molding installation requires accounting for these tiny discrepancies. If you ignore them, your joints will never close properly. Even a half degree error can leave a gap wide enough to ruin the final look.
The “compound miter” is the biggest technical hurdle. You aren’t just cutting an angle across the face of the wood. You’re also dealing with the slope of the ceiling. This requires adjusting both the miter, which is the horizontal angle, and the bevel, which is the vertical tilt of your saw. It’s a three dimensional puzzle that demands extreme precision. Without the right equipment and experience, you’ll likely burn through several lengths of expensive trim just trying to get one corner right.
Wood is a living material that reacts to the humidity and temperature of the San Gabriel Valley. When the air is damp, wood expands; in the dry heat, it shrinks. If you don’t allow your materials to acclimate to your home’s environment for at least 48 hours, your perfect joints might open up within a month. This movement is why professionals often prefer stable materials like MDF for painted finishes, as they resist these environmental shifts better than solid wood.
Fastening is another localized challenge. Modern drywall is easy to nail into, but many historic SGV homes feature lath and plaster. Plaster is brittle. If you use standard nailing techniques, you risk cracking the wall or failing to hit a solid stud. Professionals often use a combination of construction adhesive and specialized fasteners to ensure the molding stays secure without damaging the substrate. If these technical hurdles feel overwhelming, reaching out to a dependable local expert can save you from wasting expensive materials on incorrect cuts.
Identifying Wall and Ceiling Irregularities
Use a digital protractor to measure every single corner before you start cutting. Don’t guess. You should also check for “bowed” walls by running a straightedge along the surface. If you find significant dips, you might need drywall repair to level the area before the trim goes up. A flat surface is the only way to avoid unsightly gaps behind your molding that caulk simply cannot fix. Yellow stains or soft spots on your ceiling may also indicate a plumbing leak above, and addressing water damage drywall patching before installing trim ensures your new molding won’t be compromised by hidden moisture problems. The same lath and plaster walls that complicate crown molding fastening also require special anchoring techniques for shelving installation Pasadena homeowners rely on to keep heavy storage secure without crumbling the substrate.
The Math Behind the Cut: Miter vs. Bevel
Your saw has two main settings: the miter and the bevel. The miter handles the side to side angle, while the bevel controls the tilt of the blade. Most pros prefer cutting “upside down and backwards” because it treats the saw’s fence as the wall and the base as the ceiling. This technique simplifies the math and makes it easier to visualize the joint. The spring angle is the degree at which the molding sits against the wall when installed.
Professional vs. DIY: Tools, Techniques, and the “Coped” Joint
DIY methods often rely on luck. Professional techniques rely on geometry. Most homeowners attempt to join inside corners using a simple miter cut, where two 45 degree angles meet. This is known as a butt joint. While it looks fine on the day of installation, it rarely stays that way. As your home settles and the seasons change, these joints inevitably pull apart. You are left with a visible gap at the front of the molding that caulk cannot effectively hide. Professional crown molding installation avoids this failure by using a technique called coping.
The professional toolkit is significantly more robust than a standard home garage setup. We utilize 12 inch compound miter saws to handle larger profiles with ease. Pneumatic nailers allow for rapid, precise fastening without the risk of hammer marks damaging the wood. We also use laser levels to ensure long runs stay perfectly straight across uneven ceilings. Safety is another major factor. Handling 16 foot lengths of heavy trim while standing on a ladder is a two person job. One wrong move can snap the material or lead to a dangerous fall. Pros have the equipment and the manpower to manage these risks safely.
The Secret of the Coped Joint
A coped joint is the hallmark of a master carpenter. Instead of two angles meeting, one piece of molding is installed flat against the corner. The second piece is mitered at 45 degrees to reveal the profile’s shape. We then use a coping saw or a specialized grinder to cut away the back of the wood along that profile line. This allows the second piece to “nest” perfectly over the face of the first. If the wall moves or the corner isn’t square, the joint remains tight. It is the only way to ensure your corners look seamless for the life of the home.
Managing Long Runs and Scarf Joints
Most walls in modern homes are longer than a single stick of molding. Joining these pieces requires a scarf joint. We overlap two pieces using 45 degree cuts that face away from the main entryway of the room. This makes the seam virtually invisible to the naked eye. We also pay close attention to room lighting. Placing a seam directly under a recessed light or a large window will highlight even the smallest imperfection. By planning the placement of these joints, we create a continuous, unbroken line that enhances the architectural flow of your space.
Choosing Materials and Finishing for a Flawless Result
Material choice dictates the longevity and look of your project. Professional crown molding installation relies heavily on Medium Density Fiberboard (MDF) for painted finishes. MDF is a dense, engineered product that resists the warping common in solid wood. It provides a smooth, consistent surface that takes paint beautifully without showing grain patterns. It’s also a cost-effective choice for homeowners who want a high-end look on a budget. If you prefer the natural beauty of grain for a stained finish, solid wood like oak or pine is the only option. However, avoid using solid wood in bathrooms or laundry rooms. The high humidity in these spaces causes natural fibers to expand and contract rapidly, which leads to cracked joints and peeling finishes. Polyurethane molding is a smart alternative for wet areas because it’s entirely waterproof and won’t rot over time.
Save yourself hours of labor by using a pre-finish strategy. Paint your trim pieces before you ever pick up a saw. It’s much faster to roll or spray molding while it sits on saw horses than it is to paint it while standing on a ladder. This approach ensures an even coat and prevents paint from dripping onto your floors or freshly painted walls. Once the pieces are installed, your only remaining task is to touch up the fasteners and joints. This methodical workflow is why professional results look so much cleaner than typical DIY attempts. It allows the paint to cure in a controlled environment, resulting in a harder and more durable finish.
The Final Flourish: Caulking and Wood Filler
Small gaps between the trim and a textured ceiling are inevitable, even with a perfect cut. Apply a thin bead of high-quality acrylic caulk to bridge these spaces and create a seamless transition. You can smooth the caulk with a wet finger or use a specialized caulking tool to ensure the line stays straight and crisp. Wood filler is used for nail holes on the face of the molding because it can be sanded flat, while caulk is reserved for long seams where flexibility is required. This distinction ensures the trim looks like a single, solid piece of architecture rather than several joined segments.
Integrating with Interior Painting and Touch Ups
The final step is the “cut-in” phase. Use a high-quality sash brush to paint over the dried caulk lines once they have fully set. This blends the trim into the wall and covers any visible sealant. Standard trim work typically uses semi-gloss or gloss sheens to provide a subtle contrast against flat or eggshell walls. This sheen also makes the molding easier to wipe down during routine cleaning. To ensure your trim and walls match perfectly, explore our California Handyman Services for a coordinated finish that handles everything from installation to the final coat of paint.
Professional Crown Molding Installation in the San Gabriel Valley
The San Gabriel Valley is home to a diverse range of architectural styles. From the craftsman bungalows of Pasadena to the modern estates in Arcadia and the historic cottages of Monrovia, every house has its own set of challenges. Professional crown molding installation in this region requires more than just technical skill; it requires an understanding of local building history. Many older homes in the SGV feature lath and plaster ceilings that are rarely level. We specialize in managing these irregularities to provide a finish that looks straight even when the structure is not.
Hardworking Handyman™ LLC manages the entire project so you don’t have to. We understand that property managers and homeowners lead busy lives. Our team offers same-day service availability for urgent maintenance tasks, making us a vital partner for those managing rental properties in Arcadia or Alhambra. We move quickly to ensure your units are ready for new tenants without sacrificing the quality of the finish carpentry. This rapid response helps you minimize vacancy periods and keep your investment profitable. Our goal is to provide a stress-free experience that delivers immediate visual results.
Our Process for San Gabriel Valley Homeowners
We begin every project with a free estimate and a detailed on-site measurement. This step is critical. It ensures we order exactly what is needed, which eliminates material waste and keeps your costs down. During the installation, we prioritize dust mitigation. Cutting and sanding trim can be messy, especially inside an occupied home. We use specialized dust extraction equipment and protective plastic barriers to keep your living space clean and breathable. Once the work is done, we perform a final walkthrough with you. This ensures every joint and miter meets our standards for dependable craftsmanship before we pack up our tools.
Beyond Crown: Complete Trim and Maintenance Solutions
A professional crown molding installation often highlights the need for other upgrades. Coordinating your new crown with updated baseboards and door casings creates a cohesive, high-end look throughout the home. For property managers, these details are a central part of our Rental Turnover Services. Improving the interior trim is one of the fastest ways to increase property value and attract quality tenants. If you’re preparing a home for the market, you might also consider our Pressure Washing Services to ensure the exterior looks as sharp as the new interior trim. In older Monrovia properties where soil settling has shifted door frames over the years, pairing your trim upgrade with professional door repair in Monrovia ensures your entryways are as polished and secure as your newly finished interior. We provide a complete maintenance solution that simplifies your home improvement journey and protects your investment. Homeowners who want to complete their interior refresh can also benefit from professional door repair and installation services that improve both security and curb appeal alongside your new trim work. Pairing your new crown molding with functional shelving installation in Pasadena is an excellent way to complete your interior refresh and maximize both the style and storage capacity of your newly upgraded rooms.
Elevate Your Interior with Expert Precision
Achieving a flawless finish requires more than just a saw and a ladder. You now understand that successful professional crown molding installation depends on mastering coped joints and accounting for the unique irregularities of local San Gabriel Valley homes. By selecting the right materials and following a methodical finishing process, you can avoid common pitfalls like gaping corners and wasted trim. These details are what separate a standard room from a truly architectural space.
We bring dependable craftsmanship to every project in Pasadena and Arcadia. Whether you’re a homeowner looking to increase property value or a property manager focused on efficient rental turnovers and apartment maintenance, we provide the specialized skills needed for high quality results. We offer free estimates to help you plan your budget and same-day service availability for your most urgent maintenance needs. We take pride in being a reliable local resource for homeowners who value efficiency and skill.
Your home deserves a level of detail that stands the test of time. Take the next step toward transforming your living space today.
Frequently Asked Questions
How much does professional crown molding installation cost?
Pricing depends on the linear footage, the material you choose, and the complexity of your room’s layout. Factors like ceiling height and the number of corners also influence the final estimate. We provide free estimates to give you an accurate figure based on your specific home. This ensures you only pay for the materials and labor required for your unique space and architectural needs.
Can crown molding be installed on slanted or vaulted ceilings?
Yes, crown molding can be installed on slanted or vaulted ceilings using transition blocks or specialized compound miter cuts. These projects require advanced geometry to ensure the trim sits flush against both the wall and the angled ceiling. Transition blocks are often the most aesthetically pleasing solution for dramatic slopes. They provide a clean landing point for the molding to change direction without leaving ugly gaps.
Which is better for crown molding: wood or MDF?
MDF is often the better choice for painted finishes because it is more stable and less likely to warp than solid wood. Solid wood is the only option if you want a stained look that shows natural grain. For most professional crown molding installation projects involving paint, MDF offers a smoother surface and lower material costs. It resists the humidity shifts common in the San Gabriel Valley.
How long does it take to install crown molding in a standard-sized room?
A standard-sized room typically takes one full day to complete, including installation, caulking, and final touch-ups. Larger rooms or spaces with many corners may extend this timeline. We focus on efficiency to minimize the disruption to your home while maintaining a high standard of craftsmanship. Our goal is to complete the work quickly so you can enjoy your transformed interior space as soon as possible.
Do I need to remove my existing baseboards to install crown molding?
You do not need to remove existing baseboards to install crown molding. Crown molding is installed at the top of the wall where it meets the ceiling, so it does not interfere with your floor trim. However, many homeowners choose to upgrade both at the same time to ensure a consistent architectural style throughout the room. This creates a unified look that increases the overall appeal of your home.
What is the best way to handle corners that are not 90 degrees?
Coping is the best way to handle corners that are not perfectly square. This technique involves cutting the profile of one piece to fit over the face of the other, which hides gaps caused by irregular wall angles. Coping ensures a tight fit that remains seamless even as your home settles over time. It is a standard part of professional crown molding installation that prevents future maintenance issues.
Should I paint my crown molding before or after it is installed?
We recommend painting your trim before it is installed to save time and prevent a mess inside your home. Painting on the ground allows for a more even coat and protects your walls and ceilings from drips. Once the installation is finished, you only need to perform minor touch-ups on nail holes and seams. This methodical approach ensures a cleaner finish and a faster overall project timeline for homeowners.
Is crown molding still in style for modern homes in 2026?
Crown molding remains a timeless design element that continues to be a popular choice for modern homes in 2026. Modern designs often utilize simpler, cleaner profiles like cove or stepped styles to add architectural interest without looking dated. It is a proven way to increase property value and give any room a finished, high-end feel. It works well in both historic Pasadena bungalows and modern Arcadia estates.