That yellow stain on your ceiling isn’t just an eyesore; it’s a ticking clock for mold growth. It’s stressful to discover soft spots or peeling paint, especially when you’re worried about what is happening behind the wall. You want a solution that doesn’t just hide the problem but fixes it for good. Most homeowners struggle to decide if they should simply cover a stain or cut out a section of the wall entirely.
Effective water damage drywall patching requires a precise approach that goes beyond a quick coat of primer. We understand the need for a home that feels safe and looks professional, whether you’re prepping a rental for new tenants or maintaining your family home in the San Gabriel Valley. This guide teaches you how to identify moisture levels, prep the damaged area, and apply a patch that blends seamlessly with your existing texture. You’ll learn the vital three-stage process of moisture eradication, structural stabilization, and cosmetic finishing to ensure your walls stay dry and mold-free. We’ll help you clear up the confusion over joint compounds and tools so you can restore your property value with confidence.
Key Takeaways
- Perform a “Push Test” to quickly identify if the drywall core is still structurally sound or needs a full replacement.
- Confirm the leak is fixed and the area is dry before beginning water damage drywall patching to stop mold in its tracks.
- Select between “hot mud” and all-purpose joint compound based on the size of the repair and your project timeline.
- Use a fine-grit sanding sponge only after the compound turns from gray to white for a smooth, invisible finish.
- Prioritize professional-grade patching to protect property value and ensure fast turnover for rental units.
Assessing Water Damage: Should You Patch or Replace?
Drywall is essentially a sandwich of gypsum plaster between two layers of heavy paper. While it’s durable when dry, it becomes incredibly fragile when saturated. Water-damaged drywall occurs when moisture penetrates that core, causing the gypsum to soften and the paper layers to separate. This loss of structural integrity is the primary reason why professional water damage drywall patching is about more than just aesthetics; it’s about the safety and stability of your wall’s surface. Water breaks down the core. Once that happens, the material can’t be saved.
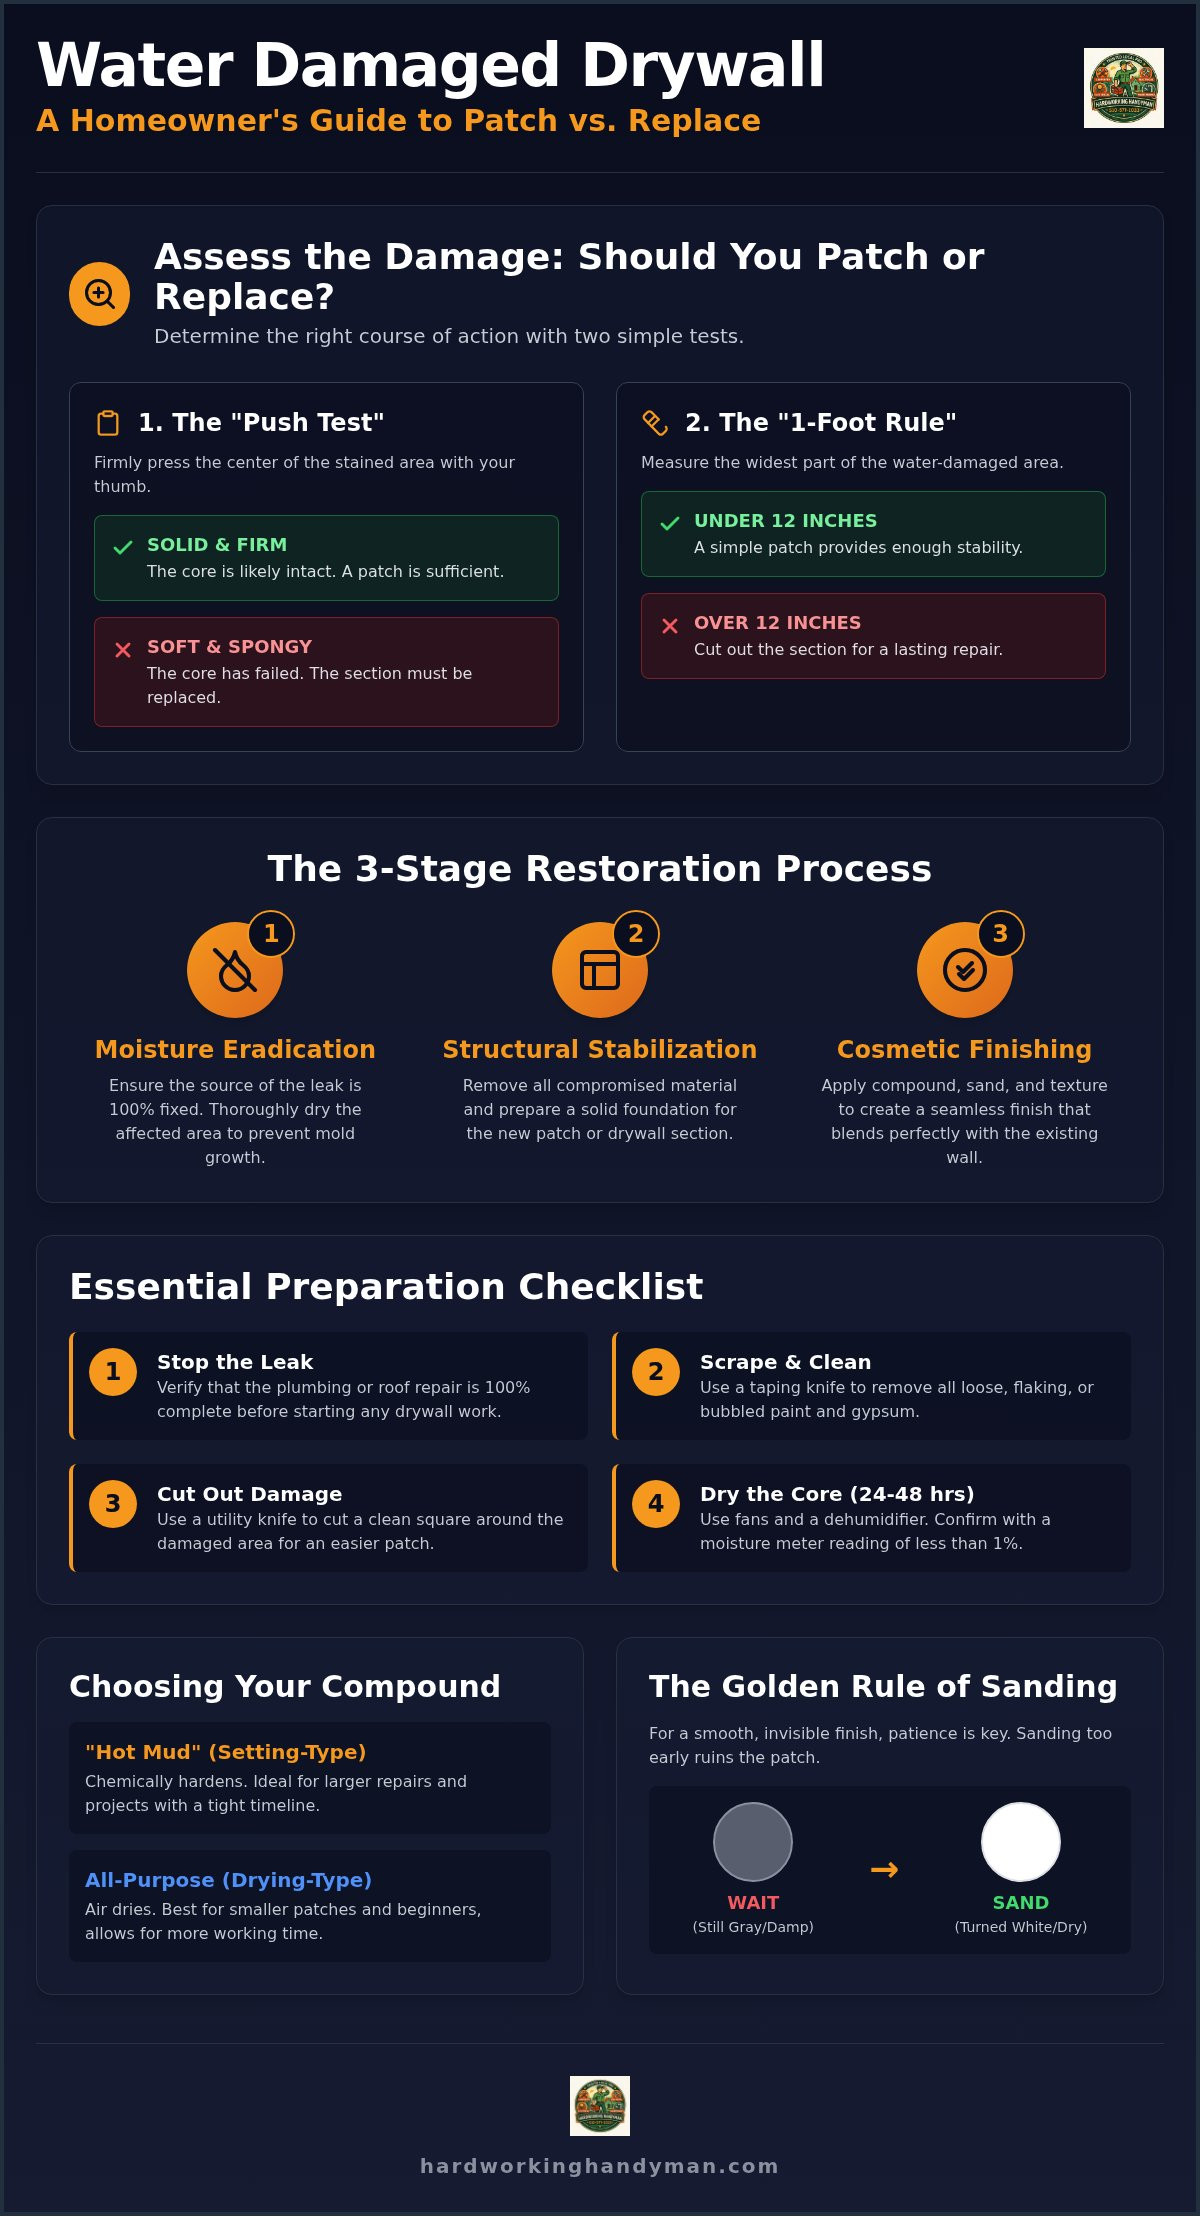
To determine if your wall is salvageable, perform the “Push Test.” Use your thumb or a blunt tool to apply firm pressure to the center of the stained area. If the surface feels solid and resists your touch, the core is likely intact. If it feels soft, spongy, or crumbles away, the board has failed. Another guideline we use is the “1-Foot Rule.” If the damaged area exceeds 12 inches in any direction, a simple patch won’t provide enough stability. In those cases, cutting out the entire section and installing a new piece of gypsum board is the only way to ensure a lasting repair.
Visual cues also tell a story. Surface staining often looks like light tea-colored rings. These are usually cosmetic. However, if you see bulging, bowing, or dark gray spots, the moisture has reached deep into the core. You’ll need to remove these saturated sections immediately to prevent mold from taking hold. Catching it early saves time and money later.
When a Patch is Sufficient
You don’t always need to tear down the wall. If you caught a leak quickly, such as a localized spill or a minor faucet drip, a patch is often the best choice. Small tea-colored stains with no structural sagging are prime candidates for a quick fix. You might see minor bubbling in the top layer of paper; this can often be scraped away and smoothed over. We recommend our California handyman services for these precision repairs to ensure the finish is invisible once the paint is applied.
SGV Home Nuances: Plaster vs. Drywall
Living in the San Gabriel Valley means dealing with a mix of modern and historic construction. Many homes in Pasadena feature older lath and plaster walls rather than modern drywall. Plaster is much denser and reacts differently to water. It doesn’t soften like gypsum, but it can crack or pull away from the wooden lath behind it. Additionally, SGV humidity levels can fluctuate. This affects how fast a wall dries out. If you’re dealing with plaster, the drying time is significantly longer. The patching process requires specific bonding agents to prevent future cracking in these dense, historic materials.
Preparation: Stopping the Leak and Drying the Core
Success begins with a dry foundation. You cannot perform water damage drywall patching effectively if the source of the moisture is still active. Verify that the plumbing repair or roof patch is 100% complete before you touch the wall. Once the leak is dead, clear your work area. Protect your Pasadena hardwood floors by laying down heavy-duty drop cloths. Dust and debris from drywall repair can settle quickly; covering your surfaces saves hours of cleanup later.
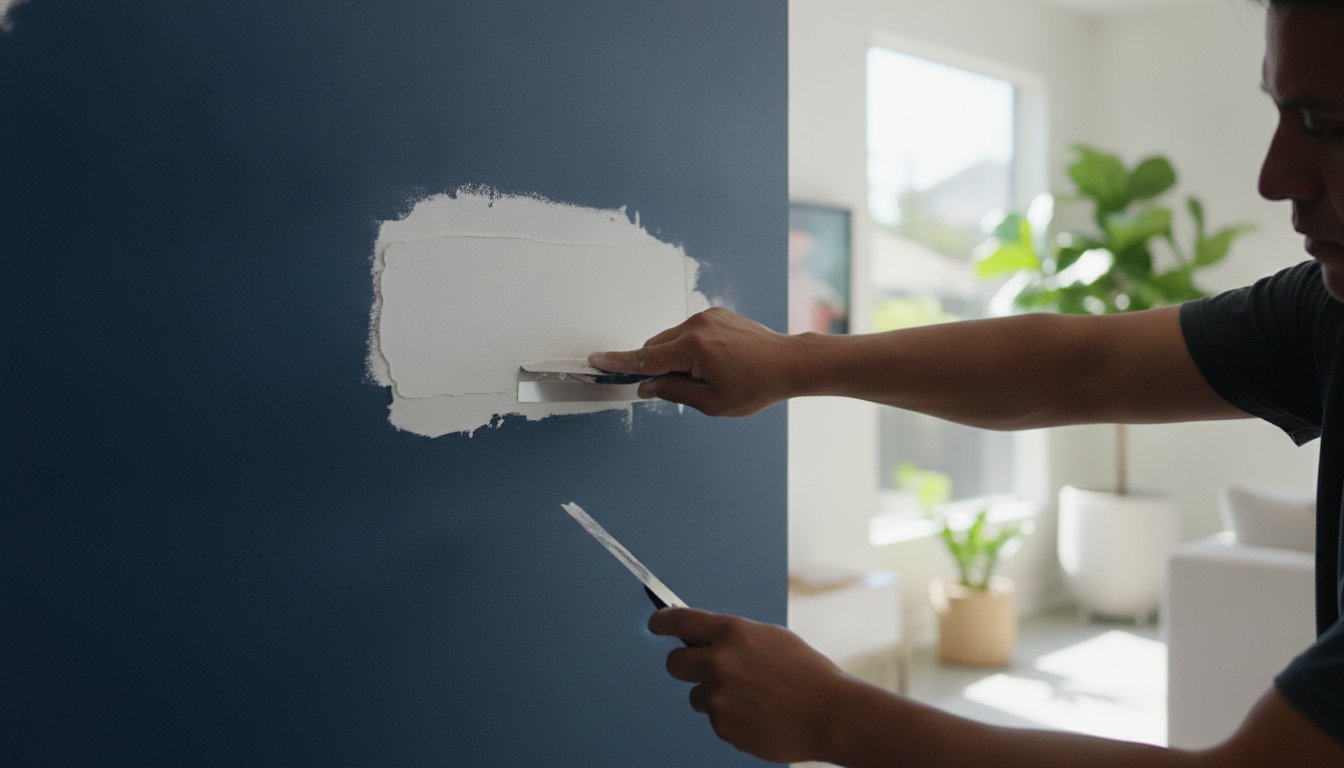
Grab a 6-inch taping knife to start the physical prep. Scrape away all loose, flaking, or bubbled paint. Remove any gypsum that feels soft or crumbly. You need to reach the solid, dry material around the perimeter of the damage. If you leave bubbled paper behind, your patch will eventually peel or crack. Set up high-velocity fans and a dehumidifier. Direct the airflow toward the wall to pull moisture out of the cavity. This is a critical step that many DIY guides overlook.
The Essential Drying Protocol
Patience is a tool in itself. Wait at least 24-48 hours after the leak stops before you attempt a repair. Use a moisture meter to verify the status of the wall. You want to see a reading of less than 1% moisture content on the surface before applying any compound. Trapping moisture behind a patch is a recipe for disaster. It leads to hidden mold growth that can ruin your air quality and require expensive remediation later. If the wall feels cool to the touch, it is likely still damp.
Cutting Out the Damage
A clean square is much easier to patch than an irregular circle. Use a sharp utility knife to cut a straight-edged box around the damaged area. This provides a stable surface for your new material to bond with. While the wall is open, check the insulation behind the sheet. If the fiberglass or cellulose is soaking wet, it must be replaced. Wet insulation loses its R-value and becomes a breeding ground for bacteria. For complex situations where you suspect structural issues, our California handyman services are available for thorough structural inspections. If the project feels overwhelming, you can always hire a professional handyman to handle the heavy lifting for you.
The Patching Process: Step-by-Step Restoration
Choose your materials based on your timeline and the size of the damage. For the initial stages of water damage drywall patching, professional installers often prefer “hot mud,” also known as setting-type joint compound. Unlike all-purpose compound that dries through evaporation, hot mud hardens via a chemical reaction. This allows you to apply multiple coats in a single day. It also resists shrinking, which is vital when filling the gaps around a new patch. Use all-purpose compound only for your final, thin skim coats to ensure a smooth finish.
Install backing support before you try to fit a new piece of drywall. If your opening is larger than a few inches, there is nothing for the new piece to grip. Cut two small strips of plywood or 1×2 pine to act as furring strips. Position them behind the existing drywall so half the wood is visible in the opening. Secure them with drywall screws through the good part of the wall. This creates a solid frame to hold your new material in place. Without this support, the patch will eventually sag or crack along the edges.
Installing the Drywall Plug
Measure your square opening and cut a new piece of gypsum board to match. Aim for a fit that leaves about a 1/8-inch gap on all sides. This gap allows the joint compound to penetrate and create a strong bond. Place the plug into the opening and drive screws through it into your furring strips. Space the screws every 4 to 6 inches. Ensure the screw heads sit slightly recessed below the paper surface. If they protrude, you’ll never get a flat finish. If they go too deep and tear the paper, they lose their holding power. Take your time with this step.
Taping and First Coat
Apply fiberglass mesh tape over the seams. Mesh tape is self-adhesive and works exceptionally well for water damage drywall patching because it doesn’t trap air bubbles like paper tape. Spread your first coat of setting-type compound directly over the mesh. Use a 6-inch knife to press the mud through the holes in the tape. This creates a mechanical bond with the drywall core. Keep this first layer thin. Feathering is the act of tapering the joint compound at the edges so it transitions smoothly into the original wall. By spreading the mud wider with each coat, you trick the eye into seeing a perfectly flat surface.
Sanding and Finishing for a Seamless Look
A flawless finish separates a DIY attempt from a professional restoration. Before you reach for your sanding sponge, verify that the joint compound is completely white. If you see gray areas, the mud is still wet in the center. Sanding damp compound will gum up your tools and tear the surface paper. Once dry, use a fine-grit sanding sponge, specifically 120-150 grit, to smooth the edges. Avoid heavy-duty sandpaper. It is too aggressive for the delicate paper layers around your water damage drywall patching area. Work in circular motions and apply light pressure to blend the edges into the existing wall.
Use the “Flashlight Test” to find hidden flaws. Hold a bright light against the wall so the beam shines parallel to the surface. This side-lighting creates long shadows behind any bumps or ridges that you might miss in normal overhead light. Sand these high spots down until the shadows disappear. If your wall has a specific texture like orange peel or knockdown, you must replicate it now. Use a texture spray or a damp sponge to match the surrounding pattern. Smooth walls require an extra thin skim coat and a final light sand to be truly invisible. Before committing to a full DIY approach, it’s worth reviewing a detailed comparison of drywall repair Pasadena homeowners rely on versus professional expert solutions to understand where DIY methods fall short.
Priming to Prevent “Flashing”
Never apply paint directly over fresh joint compound. The porous material will soak up the moisture from the paint, leaving a dull, flat spot known as “flashing.” A high-quality PVA primer is non-negotiable for new patches. It seals the material and creates a uniform surface for the topcoat to grip. This ensures the sheen of your paint remains consistent across the entire wall. For more insights on achieving high-end finishes in your home, check out our Professional Crown Molding Installation Guide. Proper priming is the secret to a professional result.
Final Paint Match
Matching paint in older Arcadia residences is often a challenge due to natural fading. If you don’t have the original paint can, take a small chip of the damaged drywall to a local paint store for a computer match. To truly hide the repair, don’t just paint the patch itself. Paint the entire section from corner to corner. This uses the natural breaks in the room to mask any slight variations in color or sheen. Clean your brushes and rollers immediately after use. Dried paint ruins equipment and makes your next project much harder to start.
Professional Efficiency for Property Managers and Landlords
For property managers, every day of vacancy is a day of lost revenue. Rapid water damage drywall patching is essential to keep your rental turnover timeline on track. Tenants expect a clean, professional interior from the moment they walk in. Visible water stains or soft spots suggest a lack of maintenance and lead to immediate complaints. We help you maintain a high standard across your portfolio by providing consistent, reliable repairs that meet professional move-in requirements. Our goal is to minimize your downtime and maximize your property’s appeal.
The cost-benefit of professional repair is clear when you consider long-term durability. A DIY patch often fails under the stress of high-traffic rental use, leading to repeat service calls. Hardworking Handyman™ LLC provides the specialized expertise needed to ensure the repair is structural, not just cosmetic. We understand the specific needs of San Gabriel Valley property owners who require fast, dependable solutions. By getting the job done right the first time, you avoid the hidden costs of poor craftsmanship and keep your maintenance budget under control.
Rental Turnover Strategies
Efficiency starts with a standardized approach to maintenance. Batch your repairs by scheduling work for multiple units in a single visit to save on mobilization fees. We also recommend using a consistent paint palette across all your properties. This makes future water damage drywall patching much faster because you won’t need to guess the color match for each unit. For more tips on streamlining your process, see our guide on Rental Turnover Services San Gabriel Valley. Simple systems produce the best results.
When to Call the Pros
Some situations require more than a simple fix. If you discover mold growth or structural sagging in a ceiling, you need professional intervention to ensure tenant safety. Large-scale repairs can be dangerous if the drywall is heavy and saturated. Hardworking Handyman™ LLC offers same-day service estimates for urgent repairs throughout Arcadia, Pasadena, and the surrounding SGV areas. Don’t let a small leak turn into a major liability. Contact us to restore your property to professional standards immediately.
Protect Your Home’s Value with Expert Repairs
You now have the technical roadmap to handle water damage drywall patching with professional precision. From the initial “Push Test” to the final “Flashlight Test,” every step ensures your walls are structurally sound and visually perfect. A dry foundation and the right joint compound are the keys to a repair that lasts for years. By following these methods, you protect your home’s interior from hidden mold and ensure your property value remains high for the long term.
Hardworking Handyman™ LLC is your trusted local resource for high-quality restoration throughout the San Gabriel Valley. We specialize in both residential repairs and rental turnover maintenance for owners in Arcadia, Pasadena, and beyond. Our team provides same-day service for urgent issues and dependable craftsmanship that you can count on every time. We are ready to get to work on your project immediately.
Take the stress out of home maintenance and enjoy the peace of mind that comes with a job well done. Your home is your most significant investment; it deserves the care of a dedicated local professional. We look forward to helping you restore your space to its original beauty and ensuring your interior stays in top condition.
Frequently Asked Questions
How long does it take for water-damaged drywall to dry before patching?
Expect a drying time of at least 24 to 48 hours under ideal conditions. Use high-velocity fans and a dehumidifier to pull moisture from the gypsum core and the wall cavity. Always verify the area with a moisture meter before starting your water damage drywall patching project. If you patch over damp material, the compound won’t bond and mold will eventually grow behind the repair.
Can I just paint over a water stain on the ceiling?
No, painting directly over a stain is a temporary fix that often fails. You must identify the leak and ensure the drywall is structurally sound first. If the drywall passes the “Push Test,” you still need to apply a dedicated stain-blocking primer. Without this step, the tannins from the water damage will bleed through the new paint and ruin the finish within days.
How do I know if there is mold behind my water-damaged drywall?
Check for dark gray or black spotting and a persistent musty odor near the stain. If the leak was active for more than 48 hours, mold has likely started to grow on the paper backing. Cutting a small inspection hole allows you to see the back of the sheet and the wooden studs. If you find fuzzy growth or significant discoloration, professional remediation is required to protect your air quality.
What is the best joint compound for patching water damage?
Setting-type joint compound, commonly known as “hot mud,” is the superior choice for the first two coats. It hardens through a chemical reaction rather than evaporation, which prevents shrinking in deep gaps. This material provides a much stronger bond for new drywall plugs. Use a lightweight all-purpose compound only for the final skim coat. It is easier to sand and helps you achieve a perfectly smooth, professional surface.
Do I need to replace the insulation if the drywall is wet?
Yes, you should always replace fiberglass or cellulose insulation if it becomes saturated. Wet insulation clumps together and loses its ability to regulate your home’s temperature. It also holds moisture against your wall studs for weeks, which leads to wood rot and mold growth. Remove the wet material immediately and allow the interior of the wall to dry completely before installing fresh insulation and new drywall.
How much does professional drywall patching cost in Pasadena?
Costs for professional repairs depend on the extent of the damage and the complexity of the wall texture. Factors such as ceiling height and the number of coats required for a seamless blend will affect the total. Every home in the San Gabriel Valley is different. We recommend requesting a professional estimate to get an accurate price based on your specific property needs and the local labor market. For a deeper look at what separates DIY attempts from expert results, see our guide to professional drywall hole repair service in Pasadena.
Can I use spackle instead of joint compound for water damage?
Spackle is only appropriate for filling tiny nail holes or very shallow scuffs. It is too brittle and dries too quickly for water damage drywall patching on a larger scale. Joint compound is designed to be layered and feathered out over a wide area, which prevents the patch from cracking as the house settles. For any repair larger than a coin, joint compound is the only reliable material for the job.
What grit sandpaper should I use for drywall patches?
Use a fine-grit sanding sponge between 120 and 150 grit for a professional finish. Coarse sandpaper is too aggressive and will tear the drywall paper or leave deep scratches in the compound. Work in circular motions with light pressure to blend the edges of the patch into the existing wall. A fine-grit sponge provides the control you need to make the repair completely invisible once it is primed and painted.