
Article by
Hardworking Handyman LLC
Hardworking Handyman™ brings decades of hands-on experience in home repair, construction, mechanical work, property maintenance, and troubleshooting. Our practical approach comes from years of working directly with homes, equipment, repairs, and real-world projects—not just writing about them. Hardworking Handyman™ serves homeowners, landlords, Realtors, and property managers throughout the San Francisco Bay Area, East Bay, and Tri-Valley, including Dublin, Pleasanton, Livermore, San Ramon, Danville, Fremont, Castro Valley, and surrounding communities. We specialize in everyday home repairs, doors, drywall, painting, fixture installation, rental turnovers, apartment maintenance, and general property maintenance. Our articles are designed to share practical home-repair knowledge, maintenance tips, and firsthand insight that helps property owners understand their homes and make informed repair decisions.
You don’t need to tear out existing trim and damage your drywall just to modernize a room. If your door jamb is plumb and structurally sound, you can replace interior door slab units directly while preserving your home’s original architectural casing. Still, cutting into a fresh slab can feel stressful. Nobody wants to waste time and materials on miscalculated hinge mortises, crooked latch holes, or an uneven reveal that rubs against the frame every time it swings.
We understand that hesitation, but getting a clean, professional fit doesn’t have to be a guessing game. In this guide, you’ll master the exact trade process to measure, fit, and hang an interior door slab without tearing out existing trim. We’ll break down hollow versus solid-core selection, frame plumbing checks, template tracing shortcuts, and edge beveling so your new door latches seamlessly on the first try.
Key Takeaways
- Learn how to replace interior door slab units cleanly without pulling off casing, damaging drywall, or repainting trim.
- Match core density and swing handing to each room’s specific needs, balancing soundproofing for bedrooms with lightweight utility for closets.
- Use your existing door as a physical template to duplicate hinge pockets, latch depths, and perimeter dimensions with complete accuracy.
- Apply proper rail trimming boundaries and strike-edge bevels to eliminate sticking edges and guarantee consistent 1/8-inch reveals.
- Identify when settled, out-of-square jambs call for dedicated mortising jigs, power planers, or professional handyman support to save time.
Interior Door Slab vs. Pre-Hung Door: Deciding the Right Replacement Path
An interior door slab is simply the standalone door leaf itself. It comes without an attached frame, hinges, or surrounding trim. Choosing to replace interior door slab units allows you to refresh your living space without tearing into adjacent wall finishes. The original jamb, casing, baseboards, and drywall stay undisturbed. This targeted approach prevents paint matching headaches and eliminates drywall dust across the home.
However, an existing frame must earn the right to host a new slab. If the jamb is structurally sound, plumb, and square, hanging a bare slab is the cleanest, most cost-effective path forward. When a jamb is rotted, badly twisted, or out of plumb by more than 1/4 inch across its height, installing a pre-hung unit becomes necessary. Trying to scribe and force a square slab into a severely racked frame takes excessive carpentry hours and rarely operates smoothly over time.
When Replacing Just the Door Slab Is Your Best Option
Choose a slab when your existing frame passes three tests: the jamb legs are plumb, the head jamb is level, and the frame wood holds screws firmly. This method is ideal for vintage homes across Pasadena and Los Angeles where custom architectural mouldings are difficult to replicate. Removing casing in older properties often breaks brittle plaster and cracks delicate trim profiles. Slab fitting also accelerates turnover times for rental properties and apartment updates, letting managers swap damaged doors quickly without touching surrounding paintwork.
Core Trade-Offs: Slab Replacement vs. Pre-Hung Installation
The choice between slabs and pre-hung systems comes down to where you spend your labor:
- Tooling requirements: Pre-hung installations require pry bars, reciprocating saws, framing levels, and shims to set a whole frame. Slab retrofits demand precision layout tools, such as router mortising jigs, wood planers, and hole-saw hole boring kits to prepare the leaf.
- Collateral wall damage: Pulling an old frame often tears drywall paper, pops fastener heads, and loosens baseboard joints. Replacing the door leaf alone eliminates this secondary repair cycle completely.
- Job timeline: Experienced technicians utilizing professional jigs can fit a slab cleanly in under two hours. Setting a pre-hung door often stretches longer once you include jamb shimming, nailing casing, caulking, and repainting trim lines.
When you want to replace interior door slab panels across multiple rooms without triggering major carpentry work, partnering with reliable California handyman services keeps the job quick, clean, and structurally precise.
Evaluating Door Core Materials, Styles, and Swing Configurations
Choosing the right door core balances budget, weight, and privacy. When you plan to replace interior door slab panels, consider how each room functions. A rental turnover demands fast, cost-effective durability, while a busy family home benefits from sound containment between living spaces and home offices. Matching the door build to the room’s specific traffic profile prevents premature wear and keeps projects running on schedule.
Hollow-Core vs. Solid-Core vs. Solid Wood Slabs
Door slabs fall into three primary categories, each suited to specific living demands:
- Hollow-core slabs: Weighing between 25 and 35 pounds, these panels feature a cardboard honeycomb interior enclosed by thin wood or composite veneer. They have an Sound Transmission Class (STC) rating of 20 to 25. Hollow doors are budget-friendly, hang quickly, and work well for laundry rooms, pantries, and quick rental turnovers.
- Solid-core composite slabs: These doors feature dense engineered wood or molded MDF cores, weighing roughly 60 to 85 pounds. Their STC rating jumps to 30 to 35, blocking roughly 50 percent more perceivable sound than hollow options. They deliver a premium, substantial feel for bedrooms, bathrooms, and home workspaces.
- Solid natural wood slabs: Built from genuine pine, oak, or maple, these bring distinct grain beauty but require sealing to prevent warping in humid Southern California coastal pockets or unventilated bathrooms.
Heavy solid-core slabs also demand sturdy jamb support. Swap out standard screws on the top hinge leaf for three-inch wood screws that bite directly into the wall framing stud to prevent door sag over time.
Determining Door Handing and Swing Clearances Accurately
Ordering the correct swing prevents costly drilling mistakes on bare slabs. Use the standard trade method to identify handing: stand inside the doorway with your back against the hinge jamb while the door is open. If the door leaf swings out to your left side, it is a left-hand door. If it swings to your right side, it is a right-hand door.
Account for floor transitions as well. Standard bottom clearance ranges from 1/2 inch to 3/4 inch above finished flooring. Homes relying on central HVAC without dedicated return air ducts in bedrooms require a 3/4-inch to 1-inch undercut to maintain steady air balance. If you want to replace interior door slab hardware without second-guessing handing or floor clearances, contact Hardworking Handyman™ LLC for prompt, accurate installation assistance.

How to Measure and Match Your Existing Door Opening
Never assume an existing doorway matches nominal factory sizing. Walls settle, framing studs shift, and jambs taper over decades. Taking a single tape measurement across the center often leads to a door that sticks at the top or leaves an unsightly gap at the sill. To successfully replace interior door slab units, measure the exact space between the stop mouldings rather than guessing off catalog dimensions.
The safest trade secret is using the original, functional door leaf as your master template. Unpin the hinges, remove the old slab, and set it flat on workbenches. If the previous door swung cleanly with uniform gaps, its physical profile gives you exact edge-to-edge references for cutting, mortising, and latch drilling.
Three-Point Frame and Slab Measurement Protocols
Confirm the interior dimensions of the jamb opening by measuring across three distinct horizontal positions:
- Width checks: Measure across the top third, middle, and bottom third of the frame. Use the narrowest number as your maximum cut width.
- Height checks: Record vertical measurements on both the left hinge leg and the right strike leg from the top jamb down to the finished floor. Uneven subfloors often cause a 1/4-inch difference between sides.
- Reveal allowance: Subtract 1/8 inch along each side stile and the top rail. A uniform 1/8-inch clearance margin prevents sticking caused by seasonal humidity changes.
Mapping Hinge Locations, Thickness, and Backset Alignment
Confirm the slab thickness first. Standard residential interior doors are 1-3/8 inches thick, while heavy exterior entries and select sound-dampening units measure 1-3/4 inches. A slab of the wrong thickness will not seat flush against the existing jamb stop.
Index every hinge measurement exclusively from the top rail downward. Record the precise distance to the top edge, bottom edge, and overall length of each hinge mortise pocket. Most interior doors use 3-1/2″ × 3-1/2″ hinges with square or rounded radius corners. Factory pre-mortised slabs rarely match older custom casing layouts, which is why starting with a blank, unmachined slab is essential.
Verify your latch layout next. Measure from the top rail to the center of the handle lockset. Check the backset distance from the door edge to the center of the face bore hole. Standard residential backset is 2-3/8 inches. Confirm this dimension before drilling to guarantee the latch bolt seats cleanly into the strike plate on the jamb.
Step-by-Step Guide: Trimming, Mortising, and Hanging the New Slab
Fitting a replacement blank requires deliberate cuts and steady hands. When you replace interior door slab stock, small layout errors show up immediately in the swing. Follow these field-tested installation steps to achieve factory-clean reveals and dependable operation.
Prepping, Sizing, and Beveling the Slab Blank
Place the new door blank on sturdy sawhorses. Lay the old door directly on top of it, aligning the top rails and hinge stiles perfectly flush. Clamp both panels together with non-marring bar clamps. Trace the bottom edge and strike stile using a sharp mechanical pencil.
Score your cut lines deeply with a utility knife before sawing. This severs the face veneer, preventing splintering and tear-out. Clamp a straight-edge track or guide rail along your cut line, then trim the excess with a fine-finish circular saw blade. On hollow-core doors, remember that internal solid blocking is limited to 1 to 1-1/2 inches. Keep bottom cuts under 1 inch total to avoid hollowing out the internal core. Finish the strike stile by planing a slight 2-degree bevel sloping toward the door stop. This bevel allows the leading edge to clear the jamb without rubbing as it swings shut.
Routing Precision Hinge Mortises and Boring Locksets
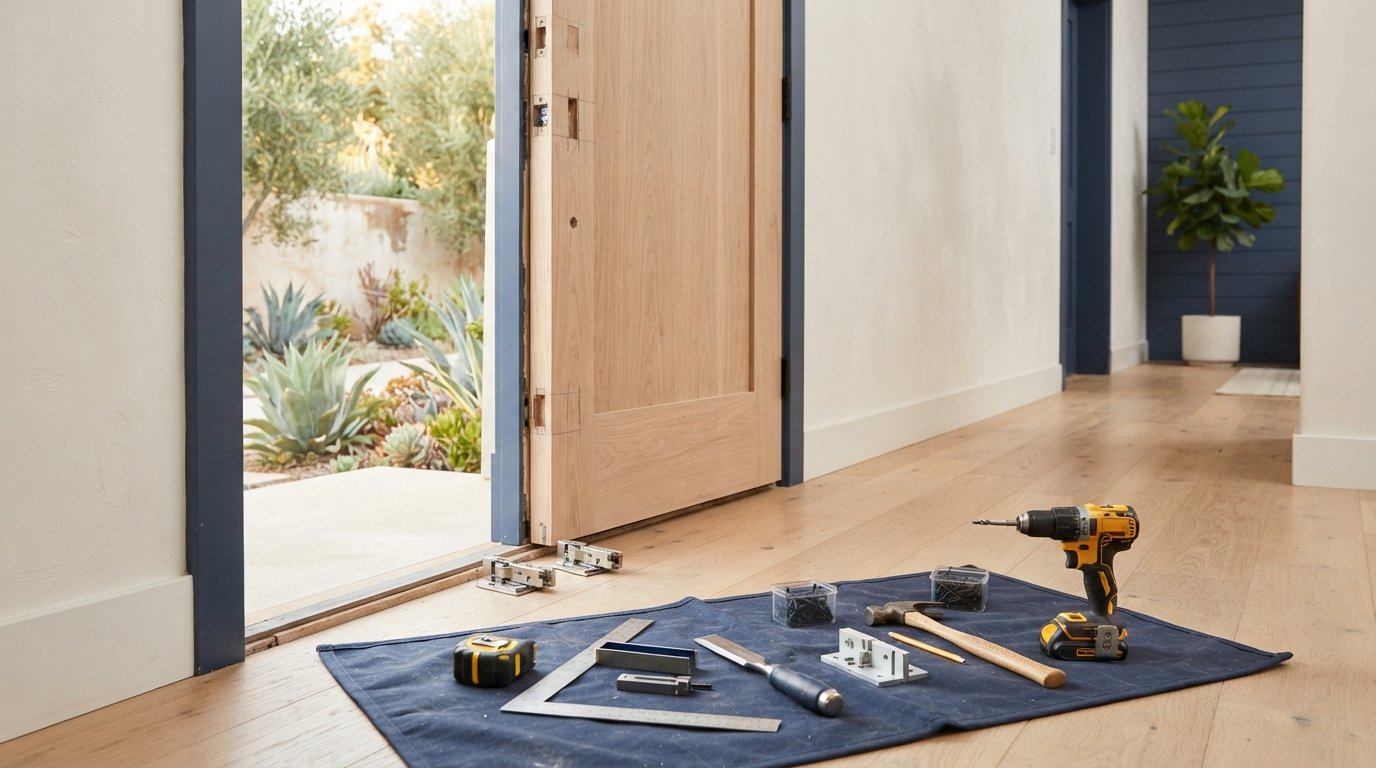
Transfer the hinge positions from the old door using a combination square. Clamp a universal door mortising jig over the marked layout. Set your router bit depth against the thickness of your new hinge leaf using scrap wood first to verify a flush seat.
Rout out each pocket smoothly. If your hinges feature square corners instead of radius corners, square off the routed edges using a sharp 3/4-inch wood chisel and mallet. Next, attach a door lock installation jig to guide the hole saws. Drill the 2-1/8-inch face bore until the pilot bit breaks through, then finish the cut from the opposite side to stop blowout. Bore the 1-inch latch hole into the edge, mortise the latch faceplate flush, and screw the hardware in place.
Hanging the Door and Adjusting Final Operating Clearances
Fasten the hinge leaves onto the slab. Carry the door to the jamb, resting the bottom rail on composite shims or an air wedge to align the hinge knuckles with the frame pockets. Slide the top hinge pin into place first, followed by the middle and bottom pins.
Drive one 3-inch screw through the center hole of the top jamb hinge directly into the wall stud. This anchors the door firmly against future sag. Test the swing across its full travel. The reveal should show a consistent 1/8-inch gap. If the latch bolt misses the strike plate, adjust the plate slightly or file the opening to ensure a crisp, effortless latch.
When to Hire a Handyman for Slab Replacement and Property Maintenance
Hanging a blank door slab requires exacting carpentry. While straightforward in theory, real-world framing often presents hidden complications. Settled foundations, shifted studs, and aged lumber can turn a simple weekend project into hours of frustrating trial and error. Knowing when to call a professional keeps your home update moving forward without ruined materials or misaligned hardware.
When you decide to replace interior door slab stock across older homes or multi-unit buildings, bringing in experienced technicians ensures every leaf swings freely and latches securely. Professional carpenters carry specialized equipment, including mortising templates, self-centering hinge bits, and edge planers. This tooling makes quick work of custom adjustments while safeguarding your existing mouldings and wall finishes.
Complex Situations Requiring Professional Carpentry Skills
Call in a professional technician when existing jambs show severe irregularities:
- Racked or twisted frames: Older homes throughout Pasadena and the San Gabriel Valley often feature jambs that have shifted out of square over time. Scribing a slab to fit a distorted opening requires progressive edge shaping to prevent binding.
- Hidden wood decay: Discovering dry rot or moisture damage at the base of a bathroom jamb means the frame cannot reliably hold hinge screws without structural patching.
- Latch alignment failures: Correcting a deadbolt or handle latch that misses the strike plate by a fraction of an inch requires expert mortise adjustment rather than gouging out the door frame.
For complicated openings or fragile trim work, choosing specialized door repair and installation protects home value and avoids costly jamb replacement.
Fast Rental Turnarounds and Reliable Property Maintenance
Vacant units cost money every day they sit idle. Property managers across Los Angeles and Orange County need efficient unit turnovers between tenant leases. Trying to replace interior door slab units individually can tie up valuable maintenance hours. A professional handyman can fit multiple slabs in a single visit, matching existing vintage profiles without opening up walls or generating drywall dust.
Handyman teams also streamline your punch list by tackling adjacent tasks during the same call. While fitting bedroom doors, our crews can handle drywall patching, install modern smart locks, secure baseboards, or handle interior painting touch-ups. Relying on established California handyman services ensures your rental properties stay clean, code-compliant, and ready for immediate occupancy.
Get Dependable Local Installation from Hardworking Handyman™ LLC
Hardworking Handyman™ LLC provides reliable door installation and property maintenance solutions across Arcadia, Pasadena, the San Gabriel Valley, Los Angeles, and Orange County. We bring the right mortising jigs, planers, and hardware tools directly to your doorstep. Skip the frustration of misaligned hinges and ruined slabs. Contact our team to request your service estimate today.
Upgrade Your Space with Clean, Level Door Installation
Refreshing your interior doors doesn’t require tearing into finished drywall or ripping out custom casing. When you replace interior door slab units by indexing directly off your original door, you preserve your existing trim and keep cleanup to a minimum. Reliable results always depend on three-point measurements, exact hinge mortising with dedicated router templates, and planing a slight bevel along the strike edge to eliminate binding.
When faced with settled framing, out-of-plumb jambs, or tight rental turnover deadlines across Pasadena and Arcadia, bringing in experienced technicians ensures every leaf swings true. Professional carpenters take the guesswork out of difficult mortises, protecting your doors and your weekend schedule.
Take your time on your layout, cut carefully along scored lines, and enjoy the quiet comfort of perfectly fitted doors in every room.
Frequently Asked Questions
Can you replace an interior door slab without replacing the frame?
Yes, you can replace interior door slab panels without disturbing the existing frame, casing, or surrounding drywall. As long as your current jamb is structurally sound, plumb, and square, hanging a replacement slab saves substantial time and prevents messy drywall repairs. Homeowners and property managers across Los Angeles and Orange County frequently choose this approach to preserve vintage woodwork and avoid repainting surrounding walls.
How do I know if my existing interior door frame is square enough for a slab?
Check your frame by measuring diagonal distances across the jamb opening and using a four-foot level on both legs. Measure corner to corner diagonally in both directions. If the two diagonal measurements differ by less than 1/4 inch, your frame is adequately square. Also verify that the jamb legs are plumb and the head jamb is level. Minor variances can easily be planed off the new slab edges.
What is the difference between a pre-hung door and a door slab?
A door slab is strictly the standalone door panel, whereas a pre-hung door includes the slab already hinged into a complete three-sided wood frame. Slabs require custom on-site routing for hinges and lockset bores to match existing frame pockets. Pre-hung units come pre-mortised from the factory, but installing one requires tearing out your old trim, leveling the new frame, and re-casing the opening.
How much should I trim off an interior door slab to fit?
Trim allowances depend on whether your door has a hollow or solid core. Hollow-core doors have internal solid rails only 1 to 1-1/2 inches deep. You should cut no more than 1/2 to 1 inch total off the bottom rail and no more than 1/8 to 1/4 inch from vertical stiles. Solid-core slabs allow more substantial trimming to accommodate out-of-square openings without compromising structural strength.
Do replacement interior door slabs come with hinge cutouts?
Most replacement slabs sold at retail suppliers come as unmachined blanks without hinge mortises or pre-drilled handle holes. This setup allows you to replace interior door slab stock to fit older homes where factory mortise positions don’t align with original jamb hinges. While pre-machined slabs exist, their hinge spacing and backset measurements rarely match legacy door frames across established San Gabriel Valley properties.
What tools are needed to install an interior door slab yourself?
Installing a blank slab requires precision cutting, routing, and drilling tools rather than basic rough-carpentry gear. You will need a circular saw with a straight-edge track, a compact router with a hinge mortising template, a corner chisel, and a hole-saw lockset installation jig. An electric hand planer helps bevel the strike edge, while non-marring clamps secure the old door to the new blank for tracing.
How do I determine if my replacement door needs a right-hand or left-hand swing?
Determine door handing by standing in the doorway with your back set firmly against the hinge jamb while the door is open. Look outward toward where the door swings. If the door panel swings open toward your left hand, you have a left-hand door. If it swings toward your right hand, it is a right-hand door. Getting this right prevents backwards latch installations on blank slabs.