
Article by
Hardworking Handyman LLC
Hardworking Handyman™ brings decades of hands-on experience in home repair, construction, mechanical work, property maintenance, and troubleshooting. Our practical approach comes from years of working directly with homes, equipment, repairs, and real-world projects—not just writing about them. Hardworking Handyman™ serves homeowners, landlords, Realtors, and property managers throughout the San Francisco Bay Area, East Bay, and Tri-Valley, including Dublin, Pleasanton, Livermore, San Ramon, Danville, Fremont, Castro Valley, and surrounding communities. We specialize in everyday home repairs, doors, drywall, painting, fixture installation, rental turnovers, apartment maintenance, and general property maintenance. Our articles are designed to share practical home-repair knowledge, maintenance tips, and firsthand insight that helps property owners understand their homes and make informed repair decisions.
Imagine you’re prepping a meal in your Pasadena kitchen, but your own shadow keeps blocking the knife. It’s a common frustration for many San Gabriel Valley homeowners who deal with dim, shadowy workspaces that make cooking feel like a chore. You know you need better light, but the thought of messy wires or complex electrical codes keeps you from starting the project. When you decide to install under cabinet lighting, you aren’t just adding bulbs. You’re upgrading your home’s safety, functionality, and resale value.
We understand that the choice between hardwired systems and plug-in kits can feel overwhelming. You want a clean, professional look without the stress of visible cords or DIY mistakes. This guide helps you master the technical requirements and installation steps to transform your kitchen with high-quality task lighting. We’ll walk through California’s Title 24 standards, explain how to hide every wire, and help you choose the right fixtures for your specific layout. From Arcadia to Alhambra, this is your roadmap to a brighter, more functional kitchen.
Key Takeaways
- Eliminate countertop shadows and improve kitchen safety with strategic fixture placement.
- Compare LED tape, puck, and bar lights to find the best fit for your specific kitchen layout.
- Decide between hardwired or plug-in power options to successfully install under cabinet lighting with a professional finish.
- Learn the proper techniques for hiding messy wires and mounting fixtures to achieve a seamless, high-end look.
- Understand local requirements and when to call a professional to ensure your upgrade adds maximum property value.
The Benefits of Under Cabinet Lighting for Your Kitchen
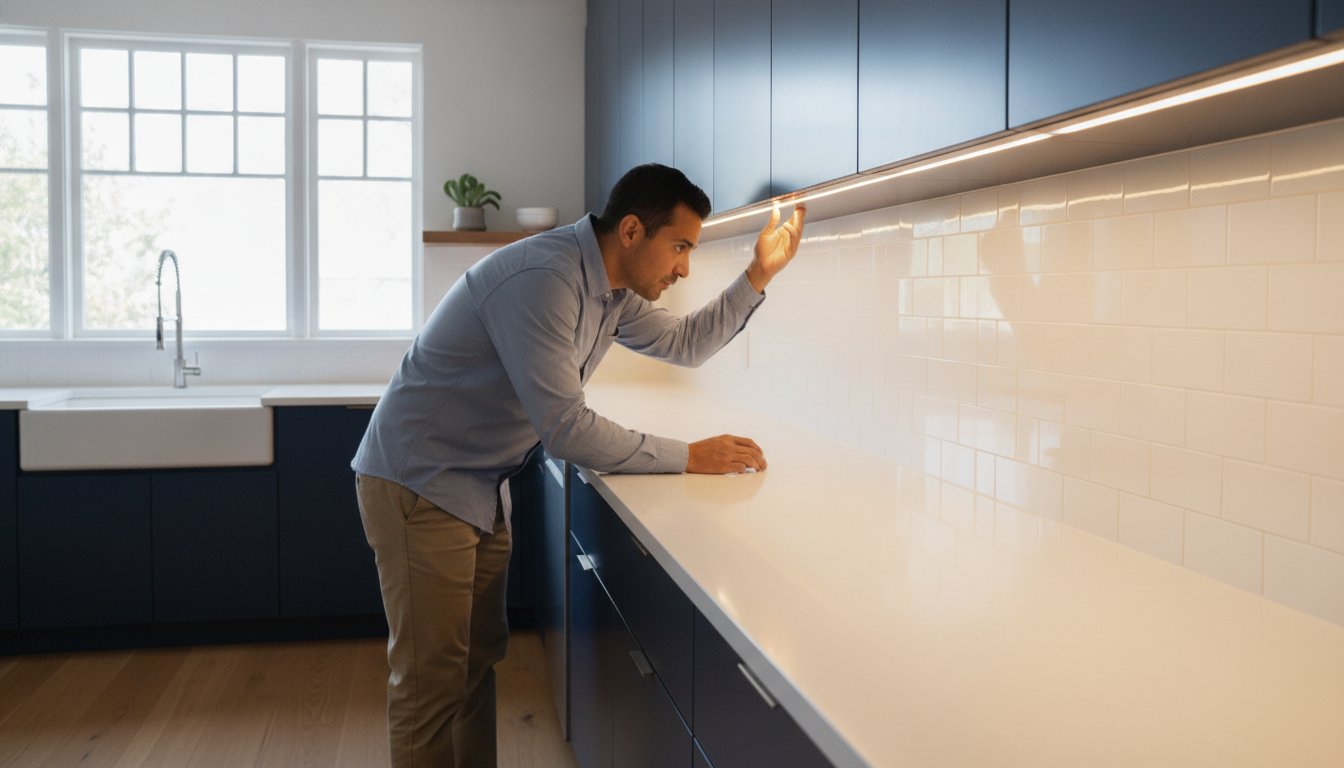
Kitchen shadows are more than a nuisance; they are a safety risk. When you prepare meals under dim overhead lights, your body often blocks the brightness, leaving your workspace in the dark. This makes it difficult to handle sharp knives safely or read small measurements in recipes accurately. Choosing to install under cabinet lighting solves this problem immediately. It places light exactly where you need it, cutting through the gloom and making your kitchen safer for everyone. Many homes in the San Gabriel Valley feature deep cabinets that cast long shadows, and this simple addition corrects that architectural flaw without the need for a full remodel.
This upgrade also improves your kitchen’s overall aesthetics. It showcases your backsplash and adds a professional glow to your countertops that overhead fixtures can’t replicate. To see how a clean installation looks without visible wires, watch this helpful video:
Task Lighting vs. Accent Lighting
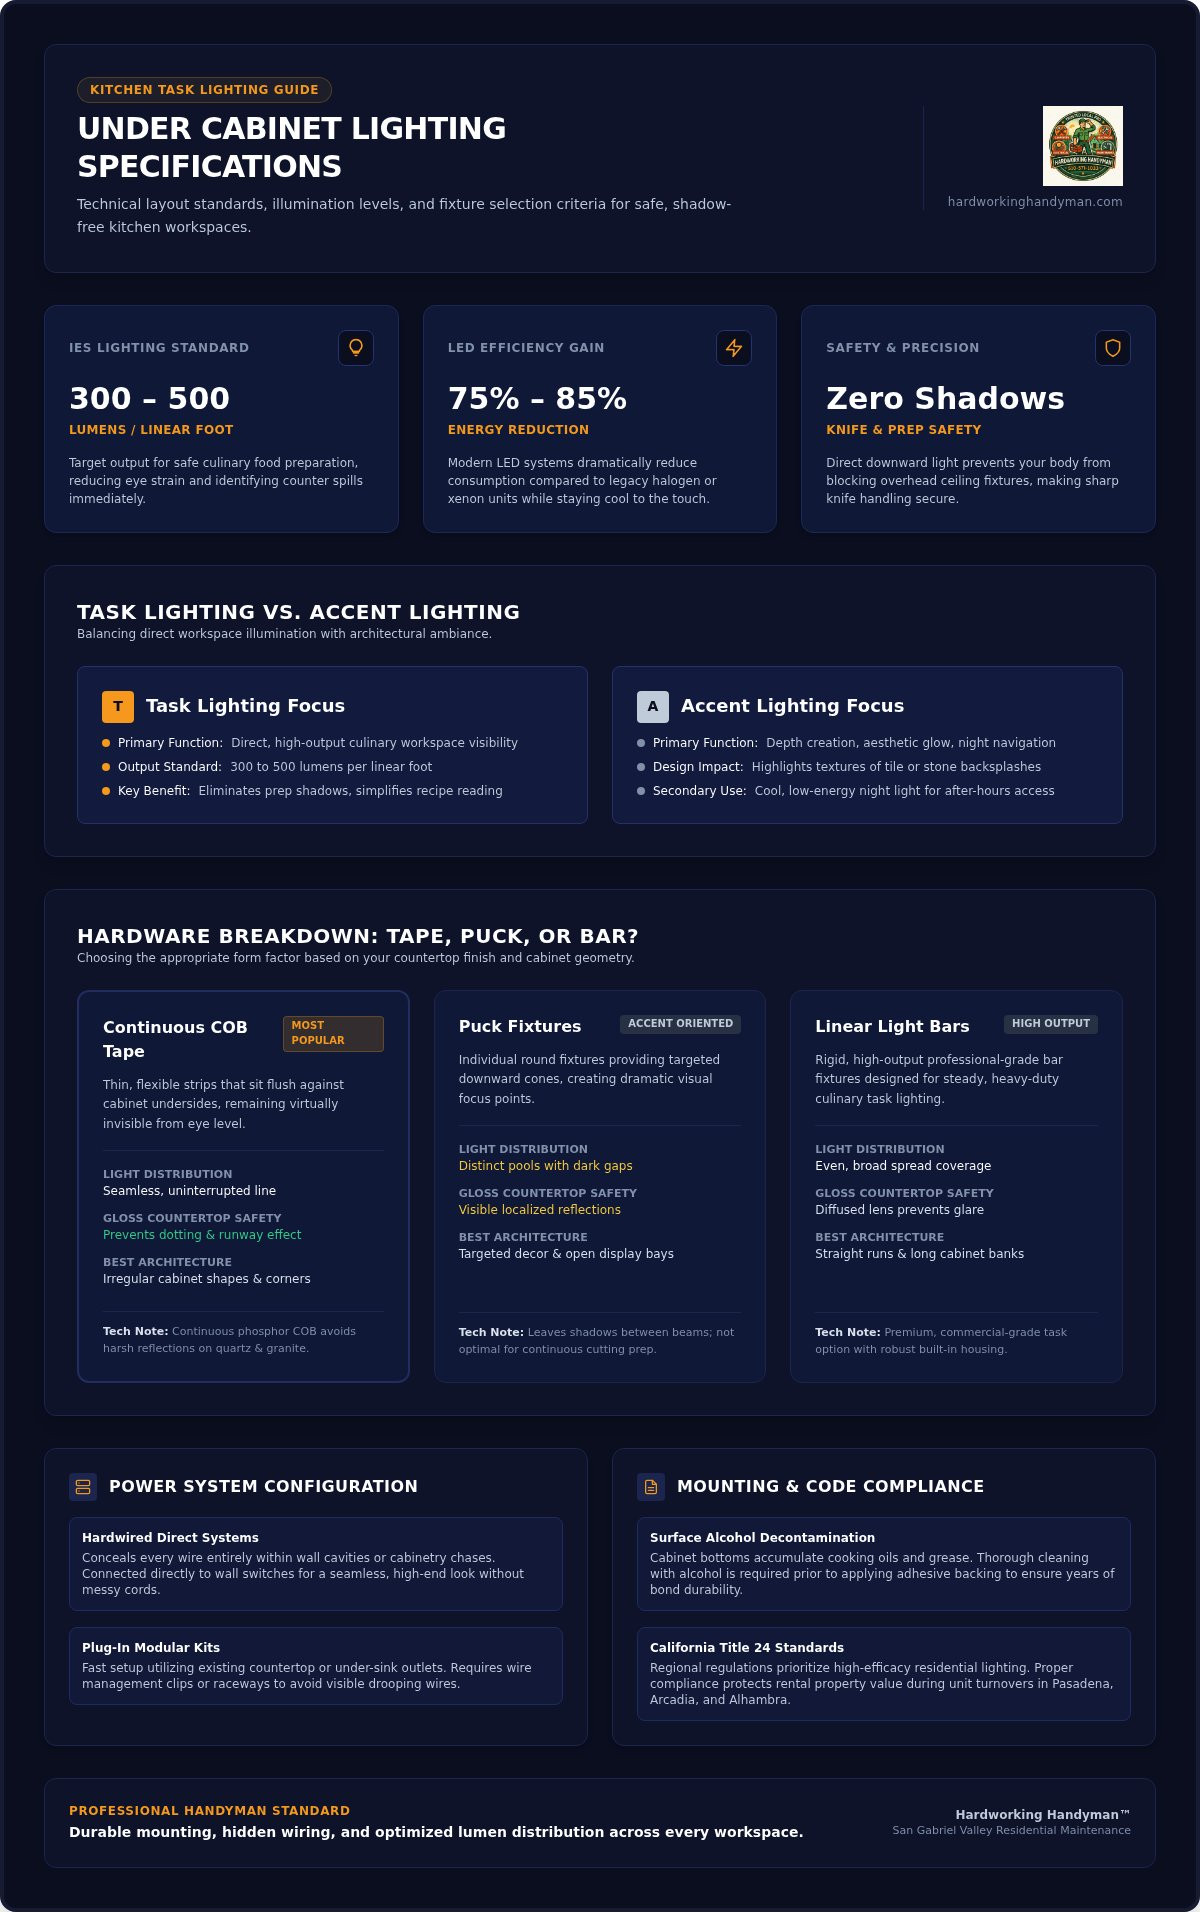
Task lighting focuses on the job at hand. It provides the direct, bright illumination needed for safe culinary work. The Illuminating Engineering Society recommends 300 to 500 lumens per linear foot for food preparation to reduce eye strain and help you spot spills before they become stains. Accent lighting is different. It creates depth and highlights the textures of your tile or stone backsplash. A well-designed kitchen balances both functions. Understanding the various types of under-cabinet lighting, such as tape or puck lights, helps you decide which style fits your specific goals and layout.
Impact on Rental Property Value
For homeowners and landlords in the San Gabriel Valley, this is a strategic investment. High-quality lighting is a top feature that attracts reliable tenants in cities like Pasadena and Arcadia. It makes a kitchen look modern and well-maintained during a rental turnover, which can justify a higher price point. Professional handyman services ensure the fixtures are mounted securely and the wires are hidden. This durability is essential for long-term property management and prevents the “messy wire” look that can turn off potential renters or buyers.
Energy efficiency is another major win for modern homeowners. Older halogen or xenon fixtures generate significant heat and consume a lot of power. In contrast, modern LED systems consume 75% to 85% less energy and stay cool to the touch. They work perfectly as low-energy night lights for late-night trips to the kitchen, providing just enough glow without waking up the whole house. When you install under cabinet lighting, you get a brighter, safer, and more valuable home with minimal ongoing costs. It’s a practical, no-nonsense improvement that pays for itself in both utility and comfort.
Choosing the Right Lighting: Tape, Puck, or Bar?
Selecting the right hardware is the first step to a successful kitchen upgrade. Your choice depends on your countertop material and how much light you actually need for daily prep. LED tape lights are the most popular option for long, seamless runs of cabinetry. They are thin, flexible, and sit flush against the cabinet bottom, making them nearly invisible from eye level. If you are planning to install under cabinet lighting on your own, tape is often the most forgiving material to work with during the layout phase.
LED Tape and Strip Lights
Standard LED strips can sometimes create a “dotting” effect on polished stone. This happens when individual diodes reflect off glossy quartz or granite, creating distracting hot spots. To avoid this, use continuous phosphor COB (Chip-on-Board) LED tape. This technology provides a seamless line of light without the runway-light look. LED tape is also the best solution for irregular cabinet shapes or corners. For a detailed walkthrough on handling these materials, consult this step-by-step guide to installing LED light strips. Always remember to clean the mounting surface with alcohol first to ensure the adhesive bond lasts for years.
Puck Lights and Linear Bars
Puck lights offer a different visual appeal. They create distinct “pools” of light, which works well for highlighting specific decor or adding depth to a backsplash. While they are great for accenting, they often leave dark gaps between the light beams. For professional-grade task lighting, linear bars are usually the better choice. These rigid fixtures provide high-output illumination and are preferred for large kitchens that require consistent brightness. You can find these in both recessed and surface-mounted styles, depending on how much of a “lip” your cabinets have to hide the fixture.
Battery-operated lights are a decent temporary fix for renters, but they lack the power of a wired system. Permanent installations provide much higher brightness and can be tied into your existing wall switches. California code now requires these fixtures to meet Title 24 JA8 standards, meaning they must have a Color Rendering Index (CRI) of 90 or higher. High CRI ensures that the colors of your food look natural and vibrant rather than dull or gray. If the technical side of power drivers and wiring feels overwhelming, you can hire a professional handyman to handle the technical details and ensure your new lights meet all local safety standards.
Hardwired vs. Plug-In: Powering Your Kitchen Upgrade
Deciding how to power your project is the most technical step when you plan to install under cabinet lighting. This choice dictates whether your kitchen looks like a quick DIY fix or a high-end custom renovation. Plug-in systems offer speed and simplicity, while hardwired systems provide a permanent, integrated feel. Each method has specific requirements under the California Electrical Code that you must follow to keep your home safe and compliant. Understanding these power sources helps you avoid common mistakes that could lead to flickering lights or tripped breakers.
When to Choose Plug-In Solutions
Plug-in lights are the best option for renters or those looking for a fast upgrade in the San Gabriel Valley. These systems utilize your existing backsplash outlets for power. They don’t require opening walls or altering your home’s permanent wiring. You can use cord covers and plastic clips to hide the lead wires along the bottom edge of your cabinets. However, keep in mind that these fixtures will occupy valuable countertop outlet space. Per California code, any outlet used in a kitchen must be GFCI-protected. If your older Pasadena home still has ungrounded outlets, you should upgrade them before plugging in new equipment.
The Professional Finish of Hardwiring
Hardwired systems offer a superior, wire-free finish. These installations tap into your home’s existing general lighting circuits rather than the 20-amp small-appliance circuits meant for blenders and toasters. This ensures your lights don’t trip breakers when you’re cooking. Most modern LED systems are low-voltage; they require a transformer or driver to convert 120V house power down to 12V or 24V. Tucking these drivers inside a cabinet or a nearby pantry keeps them out of sight and maintains a clean aesthetic.
Controlling your lights with a dedicated wall dimmer adds a layer of luxury and functionality. It allows you to shift from bright task lighting during meal prep to a soft amber glow for evening ambiance. If you want this professional look but aren’t comfortable working with junction boxes, Hardworking Handyman™ LLC can assist with light fixture installation Pasadena projects. We understand the specific challenges of historic SGV housing stock, including lath-and-plaster walls and shallow cabinet recesses. Our team provides reliable handyman services that prioritize safety and local code compliance. Professional installation ensures your new lighting is both beautiful and durable for years to come.
Step-by-Step Installation Guide for LED Strip Lights
You have selected your hardware and decided on a power source. Now you are ready to install under cabinet lighting. Success depends on careful preparation and clean wire management. A rushed job leads to sagging strips and visible cords that ruin your kitchen’s aesthetic. Follow this methodical process to achieve a professional-grade finish that lasts for years. This guide focuses on LED tape, which is the standard for modern San Gabriel Valley home upgrades because of its low profile and even light distribution.
Preparation and Layout Planning
Measure the underside of your cabinets with a metal tape measure. Record the length of every individual cabinet section carefully. Identify where the power source enters the run, usually near a backsplash outlet or inside a pantry. Planning the “run” is critical to avoid voltage drop, which causes lights at the end of a long strip to appear dimmer than those at the start. For complex kitchen layouts with staggered cabinet heights or corner units, you may need shelving installation Pasadena prep to create a flat, continuous mounting surface for your fixtures. Mark your intended light path one inch behind the cabinet face frame. This ensures the cabinet lip hides the fixture completely from eye level.
Mounting and Wiring
Clean every mounting surface with isopropyl alcohol. Kitchen cabinets accumulate grease and steam residue that prevents adhesive from bonding correctly. Wipe the area until the cloth comes away clean and the surface is completely dry. If your LED strip requires cutting, use the designated “cut marks” usually indicated by copper pads. Apply the strip along your pencil line, pressing firmly for at least 30 seconds to set the adhesive. Placing the lights toward the front of the cabinet directs the beam downward and back toward the backsplash. This provides the best task illumination for food prep and prevents glare for anyone sitting at a nearby island.
Secure all loose wires using plastic clips or insulated wire staples. Sagging wires are a safety hazard and look unprofessional. Connect the strip to your power driver and perform a final test of the entire circuit. Look for “hot spots” or distracting reflections on your countertops. If you notice uneven lighting, you may need to adjust the angle of the strip or add a diffuser channel. A perfect installation creates a seamless, shadowless glow across your entire workspace. Once the circuit is tested and the wires are tucked away, your kitchen transformation is complete.
Professional Installation vs. DIY: Making the Right Choice
Deciding to install under cabinet lighting yourself is a choice between a quick fix and a permanent home improvement. While basic battery-powered kits are easy to stick under a shelf, they often lack the power and longevity of a professional system. A high-quality installation requires a solid understanding of load balancing, voltage drop, and wire management. You must evaluate your comfort level with electrical work and your ability to route cables without damaging your cabinetry. For most homeowners in the San Gabriel Valley, the middle ground between a DIY struggle and an expensive electrical contractor is a skilled handyman.
Safety and Code Compliance
Many homes in Pasadena and Arcadia feature historic lath-and-plaster walls or mid-century wiring that can be difficult to navigate. These materials are fragile and often require specialized tools to fish wires without causing widespread cracking. Improperly tapping into a kitchen circuit can lead to overloads or non-compliance with local building standards. Professional help is vital for expert drywall repair in Arcadia, CA if your installation requires opening walls to run new lines. Hardworking Handyman™ LLC ensures every fixture meets California Title 24 JA8 high-efficacy standards. We prioritize your safety and provide free estimates for all local lighting projects.
The Handyman Advantage
We bring extensive experience in California handyman services, specifically focusing on high-value rental turnovers and apartment maintenance. Our team handles the small details that DIYers often overlook, such as hiding bulky transformers and securing every inch of wire for a clean, integrated look. We understand how to patch access holes and match existing paint perfectly, saving you from the “messy wire” look that can devalue a renovation. This professional touch directly impacts your property value and attracts higher-quality tenants or buyers. We value your time and offer same-day service for urgent kitchen upgrades that can’t wait.
Choosing Hardworking Handyman™ LLC ensures your lighting remains reliable for the next 50,000 hours of use. You avoid the common pitfalls of flickering LEDs, sagging adhesive strips, and non-compliant wiring. We provide a no-nonsense approach that focuses on efficiency and local relevance. Our goal is to give you a bright, evenly lit kitchen counter without the stress of a complex electrical project. Trust a local expert to handle the technical requirements while you enjoy the functional benefits of a beautifully lit workspace. We are ready to get to work on your San Gabriel Valley home today.
Transform Your Kitchen Today
You now have the technical roadmap to upgrade your kitchen with professional-grade task lighting. Selecting the correct fixture and power source is essential for both safety and style. When you decide to install under cabinet lighting, you make a long-term investment in your home’s value and daily functionality. Proper placement and wire management are the keys to a clean, professional finish that eliminates shadows and highlights your backsplash.
We provide reliable maintenance and light fixture installation for homeowners and property managers throughout Pasadena, Arcadia, and the San Gabriel Valley. Our team understands the specific needs of local housing and ensures every project meets California safety standards. We even offer same-day service for urgent maintenance needs and rental turnovers. Take the first step toward a brighter, safer workspace today. Enjoy a kitchen that looks great and works even better.
Frequently Asked Questions
Do I need an electrician to install under cabinet lighting?
You don’t always need an electrician for this project. A professional handyman can safely install under cabinet lighting by connecting fixtures to existing lighting circuits or utilizing plug-in systems. If your project requires adding a brand new circuit from your main electrical panel, you must hire a licensed electrical contractor. For standard light fixture installation in Pasadena or Arcadia, our team handles the mounting and wiring while ensuring your setup meets all local safety codes.
Can I install under cabinet lights without drilling into my cabinets?
Yes, you can use adhesive-backed LED tape lights to avoid drilling into your cabinetry. These strips bond directly to the underside of your cabinets. It is critical to clean the surface with isopropyl alcohol first to remove grease and ensure a permanent hold. For a more secure but still low-impact option, small plastic clips with tiny screws are often preferred. These provide better long-term reliability than adhesive alone while leaving minimal marks if removed.
What is the best color temperature for kitchen under cabinet lighting?
The best color temperature depends on your kitchen’s style. For traditional Spanish Colonial homes in the San Gabriel Valley, 3000K (warm white) creates a cozy, inviting glow. Modern kitchens with quartz counters often look best with 3500K or 4000K (neutral white). California’s Title 24 standards require these fixtures to be 4000K or lower and have a high CRI of 90 or above. This ensures your food looks natural and vibrant during preparation.
How much does it cost to have a handyman install under cabinet lighting?
We don’t provide fixed prices because every kitchen layout presents different challenges. The total depends on the number of fixtures, the power source type, and the complexity of hiding the wires. Factors like historic plaster walls or custom cabinetry in San Gabriel Valley homes can also influence the labor time. We offer free estimates for all local residents to provide an accurate quote for your specific installation. Contact us to discuss your kitchen’s unique layout.
Can under cabinet lights be installed in a rental apartment?
Absolutely. Renters should choose plug-in LED strips or battery-powered puck lights. These options don’t require permanent changes to the building’s wiring. You can use removable adhesive clips to manage the cords along the cabinet bottoms. Since we specialize in rental turnover and apartment maintenance, we recommend high-quality plug-in kits that provide professional-grade brightness without risking your security deposit. Always check your lease agreement before making even minor functional upgrades to your unit.
What happens if I have a granite backsplash and want to hide the wires?
Hiding wires against a granite backsplash requires strategic planning. We typically run the wiring up through the bottom of the cabinet boxes or tuck them tightly behind the front cabinet lip. This keeps the stone surface clear of any visible cords or plastic covers. If you use a low-voltage system, the thin wires are much easier to conceal in the small gaps between the cabinet and the wall. This creates a seamless, high-end look without damaging your stone.
Are battery-powered under cabinet lights worth it?
Battery-powered lights are a decent temporary solution for small dark spots or inside pantries. However, they aren’t ideal for full kitchen task lighting. They often lack the brightness needed for safe food prep and require frequent battery changes. For a permanent upgrade, we recommend a wired system. Wired LEDs provide consistent output and can be tied into your wall switches. This ensures your kitchen remains bright and functional without the hassle of dead batteries.
How do I connect multiple LED strips together for a long cabinet run?
You can connect multiple LED strips using snap-on jumpers or by soldering them together. Jumpers are the easiest DIY option and allow you to bridge gaps between cabinets or navigate around a range hood. It is important to monitor the total wattage of your combined strips to ensure you don’t overload the power driver. If the run is too long, you might experience a drop in brightness at the end. Planning your power entry point centrally can help prevent this issue.